Just because none of you have asked, here’s a look behind the scenes at the photo process and setup I use to make the shaving stuff look so pretty.

If you go back through the posts here, you’ll see that the photography has really evolved over time. The photo at right was shot on my kitchen table with the razors on a placemat.
Later on, I put together a basic photo setup in my den and shot some things here, using a grey bedsheet as the background.
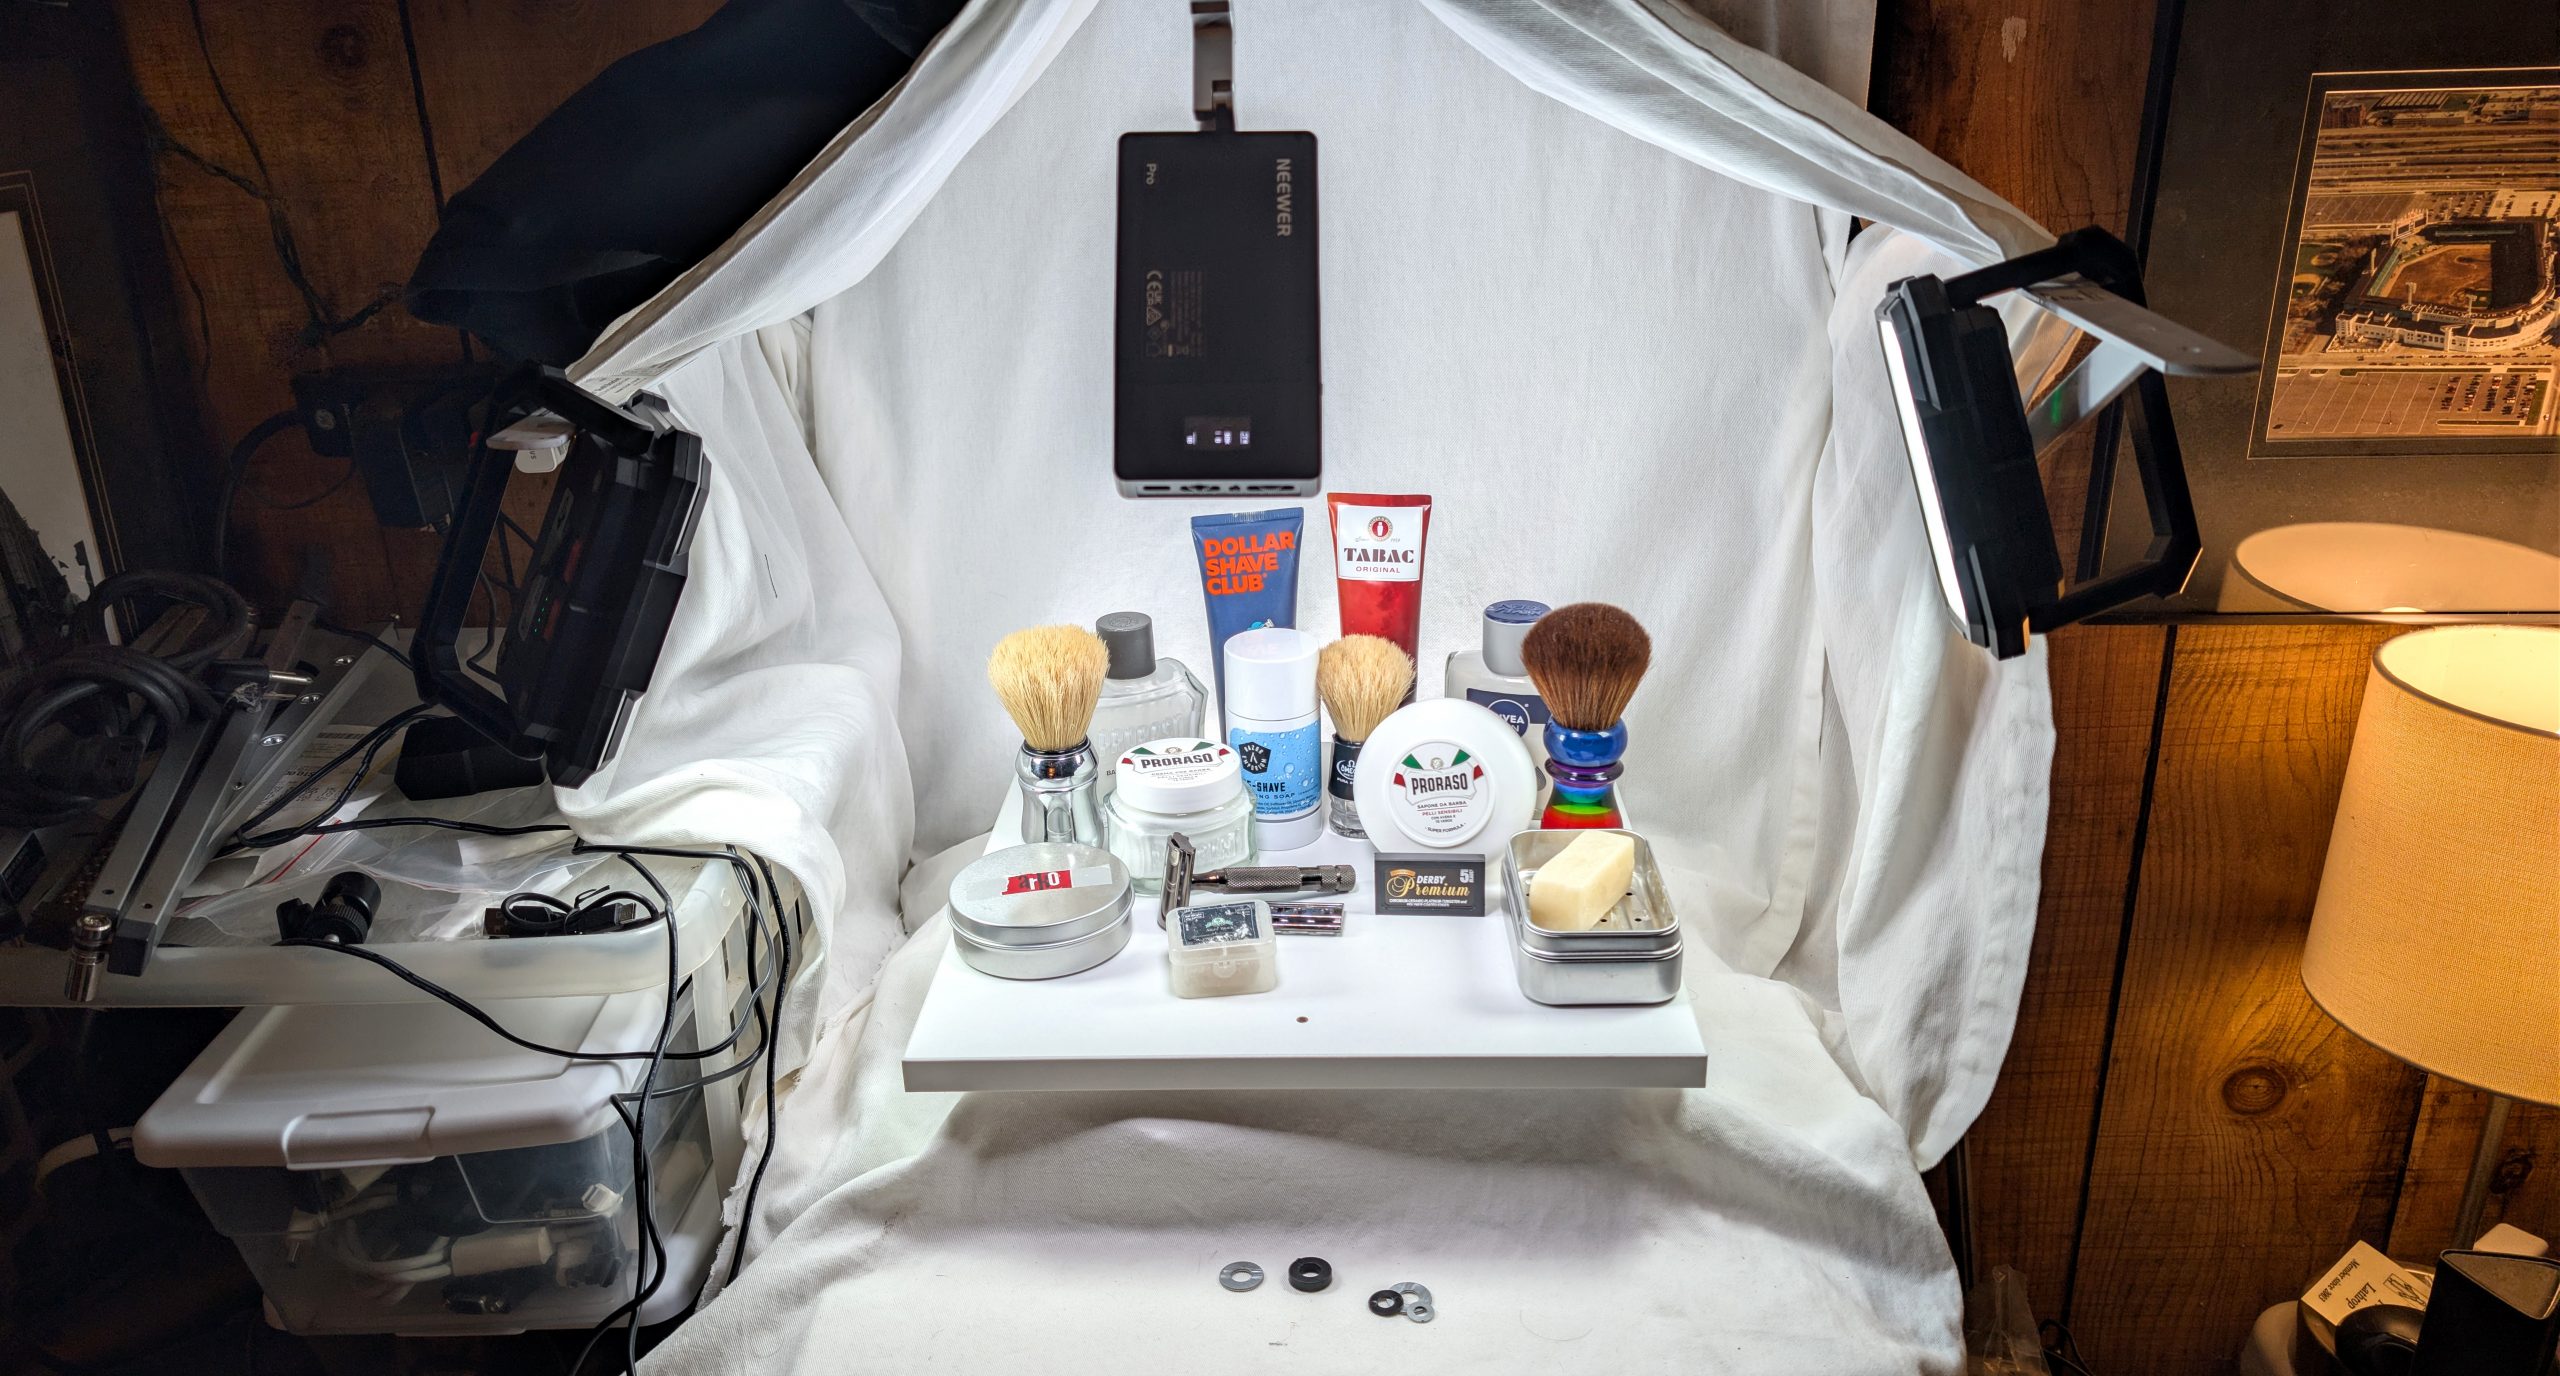
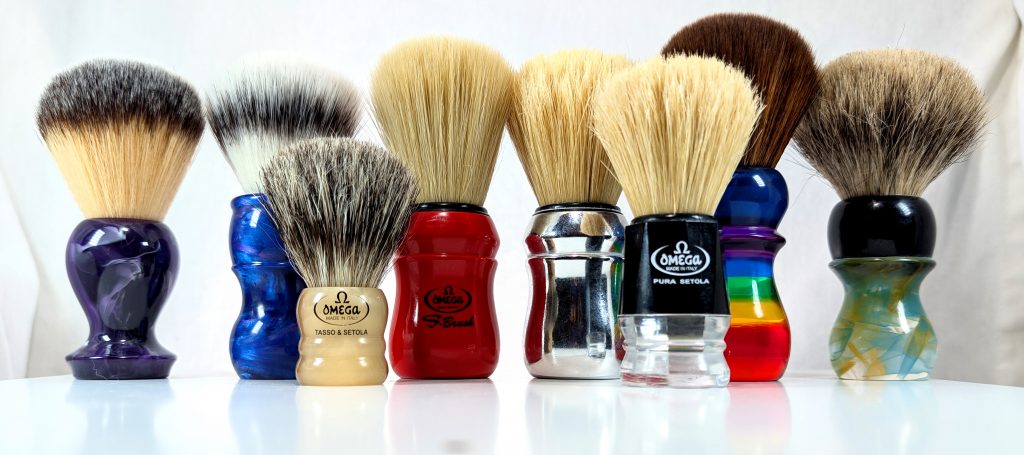
This latest look, though, is probably here for a while (if not for the duration). It’s clean with the white background and sides, and makes all of the things I use in my shaving really pop, especially when shooting a colorful item (or group of items) like my brush collection below.
The current setup is made up of some curtains we bought a while back for an earlier photo studio area in the basement, 3 shelf brackets, a couple of concrete stepping stones, an Ikea shelving door, 2 LED photo/video lights from Neewer, and 2 Husky LED work lights. Most of this, as you could probably tell from the list, was just cobbled together from stuff we already had around here.
The studio sits in my den to the left of my desk, on top of a wire basket storage system that has a plastic top. On top of that plastic top is a piece of hard styrofoam, and then 2 concrete stepping stones we made years ago. Part of the backdrop curtain covers those, and on top of that is the door from an Ikea shelf insert. It’s white, glossy, and makes for a perfectly adequate base for the products.
I cut the curtains in half vertically, so have 4 lengths of curtain (but I’m only using 2). We also have some black curtains, but black is difficult to light and photograph against, and I haven’t been happy with the results in some testing. I’ll probably keep trying, but I don’t think that will become a regular thing. The curtain that forms the background hangs from a series of screws in the wall (it’s got big metal hoops in it, so it works well), and then it’s draped down and forward to provide backdrop and a cover for the base.
The shelf brackets had been used to hold a really large and heavy shelf that we took down and broke up for trash. They’re attached to the wall and hold both 3 of the lights and a curtain that acts as the sides and top of the photo stage. They aren’t really optimal for 2 of the lights, so I may work out something better later, but for now, it does work.
Behind the elevated photo stage is a Neewer light tube that provides the back lighting. The 2 Husky work lights hang from the side supports, and a Neewer photo/video light hangs from the top bracket.
I use a handful of washers and other things to help hold items, prop them up, or keep them from rolling. Again, just stuff I have sitting around.
I take all of my pictures with my phone (currently a Pixel 9 Pro XL). The photos automatically sync with the cloud, and I’ll edit them (mostly just cropping and color/light adjustment) in Google Photos on my computer.
So now you know. Thanks for looking!